
Orval: The Secret to Frontend-Backend Coordination
- Development


Ryan Vanderpol Ryan Vanderpol
September 19, 2023 • 7 min read
How we can leverage Stripe Checkout and Customer Portal to easily build subscription management into a React.js and Node.js app.
We’ve been using Stripe since it first launched over 10 years ago. Stripe has always been one of the easiest ways to take payments online but over the years they have incrementally improved their platform and made things easier and easier.
When we needed to add a paid, premium tier to Pourwall, we knew it would be a great chance to take advantage of Stripe Checkout. Stripe Checkout has a Customer Portal that takes care of all sorts of things for your customers, like being able to subscribe, unsubscribe, change payment plans, update credit card info, view old invoices, and more.
Similar to many of the products the Beta Acid team develops for our clients, Pourwall is built on React.js and has a Node.js back end (and we use Typescript for both). Here I’ll give you a quick walkthrough of how to easily add subscription payments to your own React/Node SAAS platform.
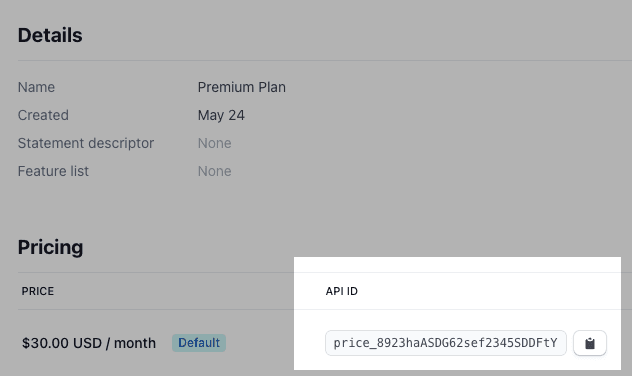
For the sake of brevity, I’m going to assume you already have a Stripe account and have created a Product with a single Price that can be used as your recurring subscription cost. You can find explicit instructions on how to set this up in the Stripe docs. We’ll use this later so you’ll need to save the Price ID from this screen.
For Pourwall, the basic flow we need to build is as follows:
Practically speaking, there will be some edge cases you’ll want to handle and a few little tweaks you’ll want to make depending on the experience you want your users to have, but that’s really about it.
Here is our React component with the button that calls our API endpoint. When the API returns the stripeCheckoutUrl we redirect the browser to Stripe to finish off the rest.
export default function AccountSettings() {
  const handleCreateSubscription = async () => {
    const { stripeCheckoutUrl } = await fetch("/api/create-subscription");
    if (stripeCheckoutUrl) {
      window.location.href = stripeCheckoutUrl;
    }
  };

  return (
    <Layout>
      <div className="max-w-3xl mx-auto p-8 lg:p-2 lg:pb-24">
        <div className="flex flex-row justify-start">
          <Button
            variant="contained"
            color="primary"
            onClick={handleCreateSubscription}
          >
            Upgrade
          </Button>
        </div>
      </div>
    </Layout>
  );
}
On the back end, we have a couple simple functions to create a customer in the Stripe platform and create the Customer Portal session. These are simply called from the API endpoint at /api/create-subscription. This assumes you have the stripe package installed and that you have environment variables with your Stripe keys.
In these examples, we pass in an Account object, which is just an object from our database that represents an account.
export const createCustomer = async (
  account: Account
): Promise<stripe.Customer> => {
  const stripeClient = getClient();
  const stripeCustomer = await stripeClient.customers.create({
    description: `${account.name} created by ${account.email}.`,
    email: account.email,
    name: account.name,
  });
  return stripeCustomer;
};
In the following snippet we also pass in a priceId parameter, which comes from the Pricing section of the Product you created in Stripe that we talked about earlier.
export const createCheckoutSession = async (
  account: Account,
  priceId: string
): Promise<stripe.Checkout.Session> => {
  const stripeClient = getClient();
  const session = await stripeClient.checkout.sessions.create({
    billing_address_collection: "auto",
    line_items: [
      {
        price: priceId,
        quantity: 1,
      },
    ],
    mode: "subscription",
    success_url: `${APP_BASE_URL}/account?success=true`,
    cancel_url: `${APP_BASE_URL}/account/subscription?canceled=true`,
    customer: account.stripeCustomerId,
  });

  return session;
};
This essentially takes care of everything you need to collect credit card information and subscribe your user to a subscription plan.
Presumably you will also want to reflect this in your app by unlocking certain features once the subscription is active. To do so, you’ll need to create another API endpoint that acts as a webhook that Stripe can call whenever something changes (the customer first subscribes, changes their plan, their credit card is declined, etc.)
This step is a little complicated because we want to verify that the request coming to the webhook endpoint is actually from Stripe. We do this by validating the stripe-signature HTTP header with our Stripe secret key. If you skip this, anyone who discovers the URL of this endpoint could issue requests to it and possibly get themselves a free subscription or delete someone else’s subscription.
We use Koa but the following code should work on Express, Next.js, and any other back end framework with very few changes.
export const handleStripeWebhook = async (ctx: Context): Promise<void> => {
  const signature = ctx.request.headers["stripe-signature"];
  if (!signature) {
    console.log(`No Stripe signature found in request headers.`);
    return ctx.sendStatus(500);
  }

  try {
    const stripeClient = new stripe(STRIPE_SECRET_KEY, {
      apiVersion: STRIPE_API_VERSION,
    });
    const event = stripeClient.webhooks.constructEvent(
      ctx.request.rawBody,
      signature,
      STRIPE_WEBHOOK_SECRET
    );
    if (event.type === "customer.subscription.created") {
      await createSubscription(event);
    } else if (event.type === "customer.subscription.updated") {
      await updateSubscription(event);
    } else if (event.type === "customer.subscription.deleted") {
      await deleteSubscription(event);
    }
  } catch (err) {
    console.log(`Webhook signature verification failed.`, err.message);
    return ctx.sendStatus(400);
  }

  ctx.body = "OK";
};
The functions you see here (like createSubscription) are simply blocks of code specific to our app that do things like update database records with the status of the user’s subscription.
And that’s it. That’s all it takes to add Stripe subscriptions to a SAAS app 🍻