
Avoid Repetition and Enforce Standards with Custom CDK Constructs in TypeScript
- Development


Adam Smith Adam Smith
October 12, 2022 • 21 min read
Building apps that function well across multiple platforms has been challenging at times, but now there are tools to speed up the process. Flutter is a great option for creating cross-platform apps for iOS, Android, Web, Windows, and macOS. With one codebase you can create a native app for each platform with very little custom code.
Out of the box, the app will look and behave similarly, though not identically, on each platform because Flutter automatically accounts for platform differences via platform adaptations.
Things that are behaviors of the OS environment (such as text editing and scrolling) and that would be ‘wrong’ if a different behavior took place. Flutter Docs – Platform Adaptions
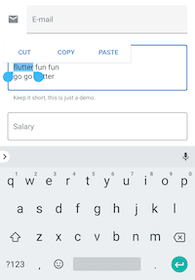
For example, here’s a standard text field in both iOS and Android. The form fields look nearly identical, but the text selection interface is customized per platform.

In many projects, you’ll want iOS users to see the more familiar iOS design system. To do this, you’ll want to use platform aware widgets. These widgets are aware of what platform they’re being displayed on and will render the UI that’s appropriate. Let’s take a look at the three ways you can put platform aware widgets to work in Flutter.
Flutter has some built-in ‘adaptive’ widgets which automatically render appropriately for iOS and Android. For example, the standard Icon widget renders the same icon for both platforms.
Icon(Icons.share);
standard Flutter icons
But if you use the adaptive version, it will render the appropriate version for each OS.
Icon(Icons.adaptive.share);
adaptive Flutter icons
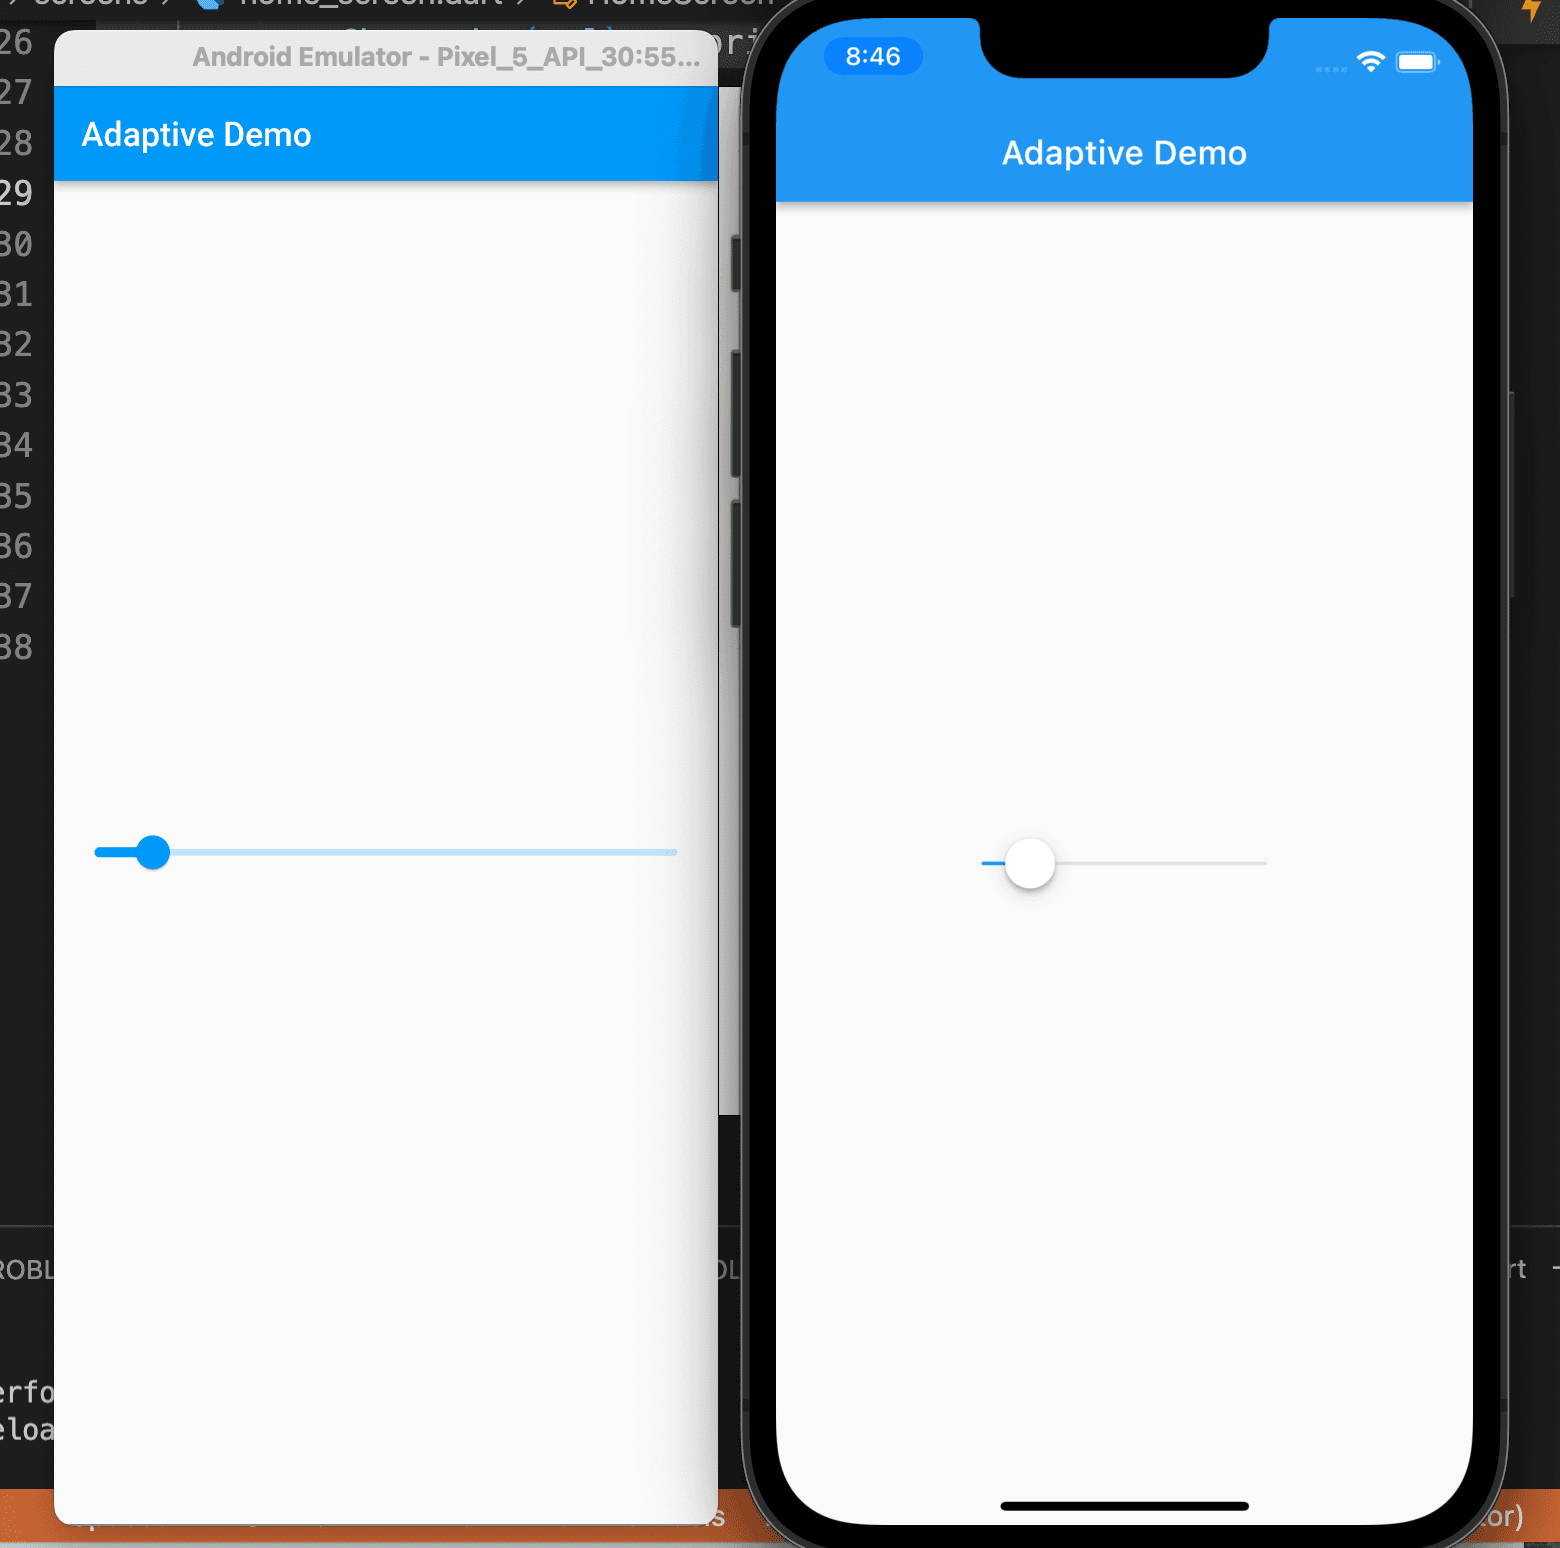
If Flutter doesn’t offer the adaptive widget you need, you can create your own pretty easily. Check the OS via the Platform class and return the appropriate widget.
 _makeSlider() {
      if (Platform.isAndroid) {
        return Slider(
          min: 0,
          max: 10,
          value: 1,
          onChanged: (val) => print(val),
        );
      } else if (Platform.isIOS) {
        return CupertinoSlider(
          min: 0,
          max: 10,
          value: 1,
          onChanged: (val) => print(val),
        );
      }
    }
Material and Cupertino version of a Slider
Luckily, there’s a package available that solves this problem. flutter_platform_widgets offers 23 platform aware widgets and has done the work to make sure they integrate well together.
To get started just call
flutter pub add flutter_platform_widgets
Here is the code for both the platform aware and unaware components.
import 'package:flutter/cupertino.dart';
import 'package:flutter/material.dart';
import 'package:flutter_platform_widgets/flutter_platform_widgets.dart';
import 'package:platformaware/screens/aware_home_screen.dart';

class AwareApp extends StatelessWidget {
  const AwareApp({Key? key}) : super(key: key);

  @override
  Widget build(BuildContext context) {
    return const PlatformApp(
      localizationsDelegates: [
        DefaultMaterialLocalizations.delegate,
        DefaultWidgetsLocalizations.delegate,
        DefaultCupertinoLocalizations.delegate,
      ],
      home: AwareHomeScreen(),
    );
  }
}
import 'package:flutter/material.dart';
import 'package:flutter_platform_widgets/flutter_platform_widgets.dart';
import 'package:platformaware/screens/dummy_screen.dart';

class AwareHomeScreen extends StatelessWidget {
  const AwareHomeScreen({Key? key}) : super(key: key);

  @override
  Widget build(BuildContext context) {
    return PlatformScaffold(
      appBar:
          PlatformAppBar(title: const Text('Platform Demo'), trailingActions: [
        PlatformIconButton(
            onPressed: () {
              Navigator.push(
                  context,
                  platformPageRoute(
                    context: context,
                    builder: (_) => const DummyScreen(),
                  ));
            },
            icon: const Icon(Icons.add))
      ]),
      body: Padding(
        padding: const EdgeInsets.all(20.0),
        child: Column(
          mainAxisAlignment: MainAxisAlignment.center,
          crossAxisAlignment: CrossAxisAlignment.center,
          children: [
            PlatformTextField(
              hintText: 'First name',
            ),
            PlatformSwitch(value: true, onChanged: (value) => print('update')),
            PlatformSlider(
              min: 0,
              max: 10,
              value: 1,
              onChanged: (val) => print(val),
            ),
            PlatformTextButton(
                onPressed: () {
                  showPlatformDatePicker(
                    context: context,
                    initialDate: DateTime.now(),
                    firstDate:
                        DateTime.now().subtract(const Duration(days: 1000)),
                    lastDate: DateTime.now().add(const Duration(days: 1000)),
                  );
                },
                child: const Text('choose date')),
            PlatformTextButton(
              onPressed: (() {
                showPlatformDialog(
                  context: context,
                  builder: (_) => PlatformAlertDialog(
                    title: const Text('Alert'),
                    content: const Text('Some content'),
                    actions: <Widget>[
                      PlatformDialogAction(
                        child: PlatformText('Enable'),
                        onPressed: () => Navigator.pop(context),
                      ),
                      PlatformDialogAction(
                        child: PlatformText('Disable'),
                        onPressed: () => Navigator.pop(context),
                      ),
                    ],
                  ),
                );
              }),
              child: const Text('show a dialog'),
            ),
            PlatformPopupMenu(
                options: [
                  PopupMenuOption(
                    label: 'Option One',
                  ),
                  PopupMenuOption(
                    label: 'Option Two',
                  ),
                  PopupMenuOption(
                    label: 'Option Three',
                  )
                ],
                icon: const Icon(
                  Icons.more_horiz,
                )),
          ],
        ),
      ),
    );
  }
}
import 'package:flutter/cupertino.dart';
import 'package:flutter/material.dart';
import 'package:platformaware/screens/unaware_home_screen.dart';

class UnawareApp extends StatelessWidget {
  const UnawareApp({Key? key}) : super(key: key);

  @override
  Widget build(BuildContext context) {
    return const MaterialApp(
      localizationsDelegates: [
        DefaultMaterialLocalizations.delegate,
        DefaultWidgetsLocalizations.delegate,
        DefaultCupertinoLocalizations.delegate,
      ],
      home: UnawareHomeScreen(),
    );
  }
}
import 'package:flutter/material.dart';
import 'package:platformaware/screens/dummy_screen.dart';

class UnawareHomeScreen extends StatelessWidget {
  const UnawareHomeScreen({Key? key}) : super(key: key);

  @override
  Widget build(BuildContext context) {
    return Scaffold(
      appBar: AppBar(title: const Text('Platform Demo'), actions: [
        IconButton(
            onPressed: () {
              Navigator.push(
                context,
                MaterialPageRoute(builder: (context) => const DummyScreen()),
              );
            },
            icon: const Icon(Icons.add))
      ]),
      body: Padding(
        padding: const EdgeInsets.all(20.0),
        child: Column(
          mainAxisAlignment: MainAxisAlignment.center,
          crossAxisAlignment: CrossAxisAlignment.center,
          children: [
            const TextField(
              decoration: InputDecoration(
                hintText: 'First name',
              ),
            ),
            Switch(value: true, onChanged: (value) => print('update')),
            Slider(
              min: 0,
              max: 10,
              value: 1,
              onChanged: (val) => print(val),
            ),
            ElevatedButton(
                onPressed: () {
                  showDatePicker(
                    context: context,
                    initialDate: DateTime.now(),
                    firstDate:
                        DateTime.now().subtract(const Duration(days: 1000)),
                    lastDate: DateTime.now().add(const Duration(days: 1000)),
                  );
                },
                child: const Text('choose date')),
            ElevatedButton(
                onPressed: () {
                  showDialog(
                      context: context,
                      builder: ((context) {
                        return AlertDialog(
                          title: const Text('alert!'),
                          content: const Text('some alert content'),
                          actions: [
                            TextButton(
                              child: const Text('Disable'),
                              onPressed: () {
                                Navigator.of(context).pop();
                              },
                            ),
                            TextButton(
                              child: const Text('Enable'),
                              onPressed: () {
                                Navigator.of(context).pop();
                              },
                            ),
                          ],
                        );
                      }));
                },
                child: const Text('show an alert')),
            PopupMenuButton(
              itemBuilder: (context) {
                return const [
                  PopupMenuItem(
                    child: Text('one'),
                  ),
                  PopupMenuItem(
                    child: Text('two'),
                  ),
                  PopupMenuItem(
                    child: Text('three'),
                  ),
                ];
              },
            ),
          ],
        ),
      ),
    );
  }
}
Let’s take a look at the difference when you use a platform aware widget. Here’s a version that’s not platform aware. Notice there are some minor differences, but overall its similar though looks a little ‘off’ for iOS.
video: Standard platform unaware version
Now let’s look at the app updated to use the flutter_platform_widgets components with no other changes. Notice that the Android version looks the same, but the iOS version looks like a typical iOS app.
video: flutter_platform_widgets platform aware version
The flutter_platform_widgets package offers the ability to both extend and theme all of these components. With just a little extra work, your Flutter app can look at home on both iOS and Android, creating a seamless experience for every user.